The construction industry constantly evolves, introducing innovative solutions that enhance building efficiency and sustainability. One such innovation is the Cellular Lightweight Concrete (CLC) block. These blocks are gaining traction for their lower environmental impact, reduced weight, and good insulating properties compared to traditional bricks or concrete units. The process of making CLC blocks involves introducing millions of micro-sized air bubbles into a cement-based mixture, creating a product that while lightweight, maintains the strength characteristics of concrete. Incorporating an essential component like a cement release agent ensures the smooth demolding of these blocks.
Delving into the manufacturing process, it’s essential to understand each step to ensure the production of high-quality CLC blocks. Here’s a detailed exploration:
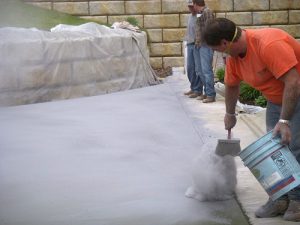
- Preparing Raw Materials: The primary ingredients for CLC blocks include cement, sand, fly ash, water, and a foaming agent. These materials are readily available in the market and are known for their affordability. Quality checks on these raw materials are crucial to ensure the strength and durability of the final product.
- Creating Foam: The foaming agent is diluted with water and then whipped in a specialized foaming generator. This process continues until it produces high-quality foam with a consistency similar to shaving cream. This foam determines the lightness of the CLC blocks.
- Mixing Process: In a commercial setting, a concrete mixer is used for this step. Cement, sand, and fly ash are introduced into the mixer to combine thoroughly. The foam is then added to this mixture, continuing the mixing process to ensure the foam is distributed uniformly, creating a lightweight, cellular structure throughout the material.
- Incorporating Cement Release Agent: Here, the cement release agent becomes pivotal. This agent is applied to the surfaces of the molds to ensure that the formed CLC blocks can be removed smoothly, without sticking or causing damage. The quality of the cement release agent is paramount, and for trusted options, you might consider exploring professional and industrial-grade selections at CABR.
- Pouring the Mixture into Molds: Once the mixture achieves the correct consistency, it’s poured into molds. The size of the mold depends on the desired size of the CLC blocks. It’s a delicate process that requires precision to ensure each block is uniform.
- Curing Process: The filled molds are kept in a warm environment to aid the curing process. Curing typically takes around 24 hours, after which the blocks attain the necessary strength to be demolded. However, they will need additional curing time out of the molds to reach their full strength.
- Demolding: After curing, it’s time to remove the blocks from the molds. Thanks to the cement release agent applied earlier, this step is generally straightforward and doesn’t compromise the integrity of the blocks.
- Quality Inspection: Each block undergoes stringent quality checks. These inspections are crucial to ensure the blocks meet industry standards and are safe for construction purposes.
Through this methodical and precise process, CLC blocks are created to meet the growing demand for eco-friendly and efficient building materials. Each stage, from the preparation of raw materials to the application of the cement release agent, and through to the final inspection, contributes to the superior quality, durability, and reliability of CLC blocks in modern construction